
Tongue & Groove
TONGUE & GROOVE SOLID WOOD FLOORING
Tongue & groove solid wood flooring is renowned for its exceptional stability, longevity, and timeless beauty. The simple tongue & groove installation method allows each plank to fit perfectly together, creating a seamless and sturdy surface for your solid wood flooring.
At Flooring365, we take pride in offering a wide range of high-quality tongue & groove solid wood flooring options to transform your space, and our team of flooring experts is dedicated to helping you find the perfect tongue & groove flooring for your project. We provide personalized guidance and expert advice to ensure that you make an informed decision. With our years of experience and commitment to exceptional products, you can trust us to deliver a smooth and enjoyable flooring experience from selection to installation.
Order your completely FREE, unlimited, no obligation Solid Wood Flooring Samples today.
-

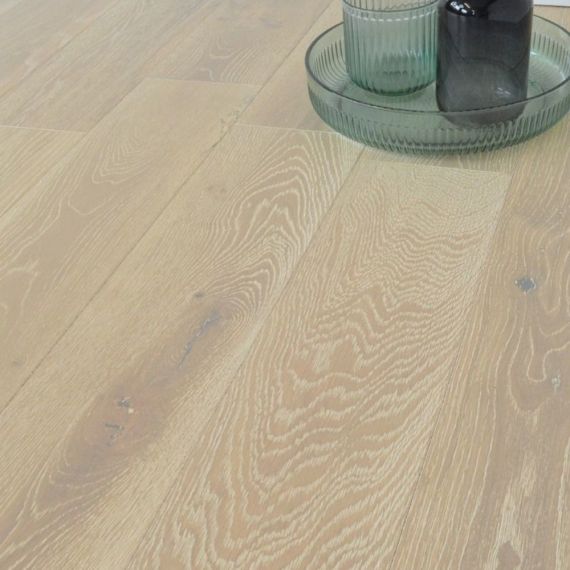
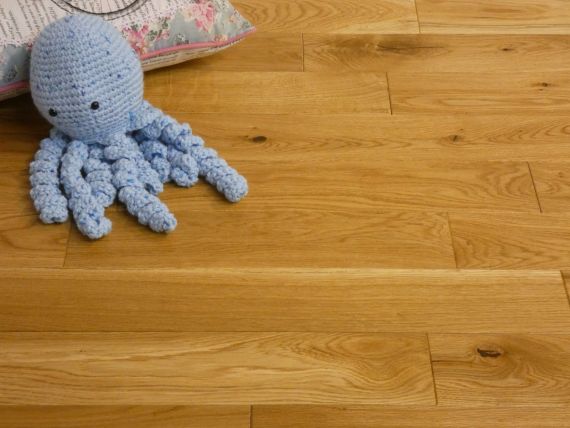
 Twickenham Solid Natural Oak Brushed and Oiled 90mm x 18mm Wood Flooring
£ 74.49 m² inc. VAT
£44.99㎡
inc. VAT£44.99㎡
inc. VATProduct Code: 90BO1
-
OakSpecies
-
Brushed & OiledFinish
-
90mm X 18mmWidth/Depth
-
Tongue & GrooveInstall
-
300-1200mmLength
-
-
 Edmonton Solid Natural Oak Brushed and Oiled 125mm X 18mm Wood Flooring
£ 94.99 m² inc. VAT
£45.99㎡
inc. VAT£45.99㎡
inc. VATProduct Code: 125BOX1
-
OakSpecies
-
Brushed & OiledFinish
-
125mm X 18mmWidth/Depth
-
Tongue & GrooveInstall
-
300-1200mmLength
-
-
 Twickenham Solid Natural Oak Brushed and Oiled 150mm X 18mm Wood Flooring
£ 92.49 m² inc. VAT
£48.99㎡
inc. VAT£48.99㎡
inc. VATProduct Code: 150BO1
-
OakSpecies
-
Brushed & OiledFinish
-
150mm X 18mmWidth/Depth
-
Tongue & GrooveInstall
-
300-1200mmLength
-
-
 Twickenham Solid Natural Oak Brushed & Lacquered 150mm x 18mm Wood Flooring
£ 94.99 m² inc. VAT
£50.99㎡
inc. VAT£50.99㎡
inc. VATProduct Code: 150BL1
-
OakSpecies
-
Brushed & LacqueredFinish
-
150mm X 18mmWidth/Depth
-
Tongue & GrooveInstall
-
300-1200mmLength
-
-
 Twickenham Solid Natural Oak Oiled 150mm X 18mm Wood Flooring
£ 90.99 m² inc. VAT
£52.99㎡
inc. VAT£52.99㎡
inc. VATProduct Code: 150OIL1
-
OakSpecies
-
OiledFinish
-
150mm X 18mmWidth/Depth
-
Tongue & GrooveInstall
-
300-1200mmLength
-
-
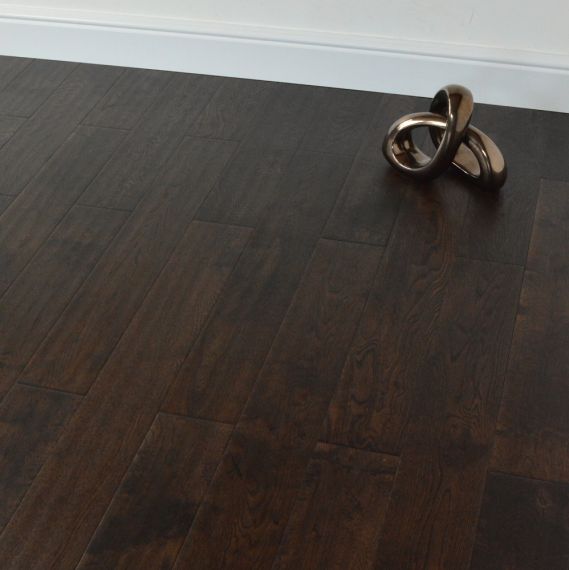
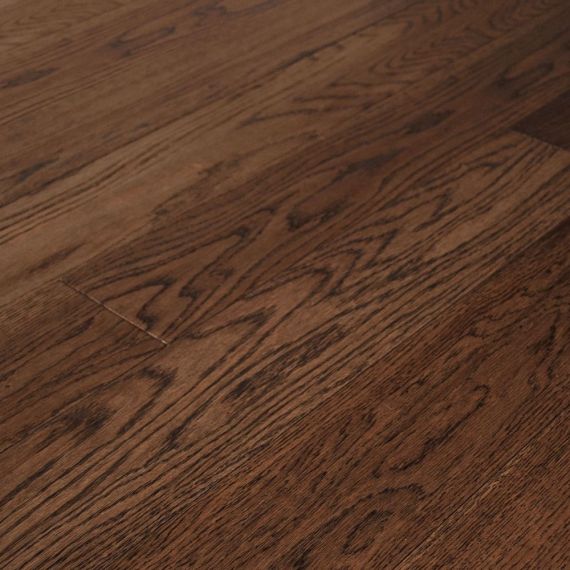
 Twickenham Solid Coffee Oak Brushed & Lacquered 90mm x 18mm Wood Flooring
£ 88.49 m² inc. VAT
£49.99㎡
inc. VAT£49.99㎡
inc. VATProduct Code: 90COF1
-
OakSpecies
-
Brushed & LacqueredFinish
-
90mm X 18mmWidth/Depth
-
Tongue & GrooveInstall
-
300-1200mmLength
-
-
 Edmonton Solid Natural Oak Lacquered 125mm X 18mm Wood Flooring
£ 103.49 m² inc. VAT
£46.99㎡
inc. VAT£46.99㎡
inc. VATProduct Code: 125LACX1
-
OakSpecies
-
LacqueredFinish
-
125mm X 18mmWidth/Depth
-
Tongue & GrooveInstall
-
300-1200mmLength
-
-
 Twickenham Solid Natural Oak Lacquered 150mm X 18mm Wood Flooring
£ 91.49 m² inc. VAT
£49.99㎡
inc. VAT£49.99㎡
inc. VATProduct Code: 150LAC1
-
OakSpecies
-
LacqueredFinish
-
150mm X 18mmWidth/Depth
-
Tongue & GrooveInstall
-
300-1200mmLength
-
-
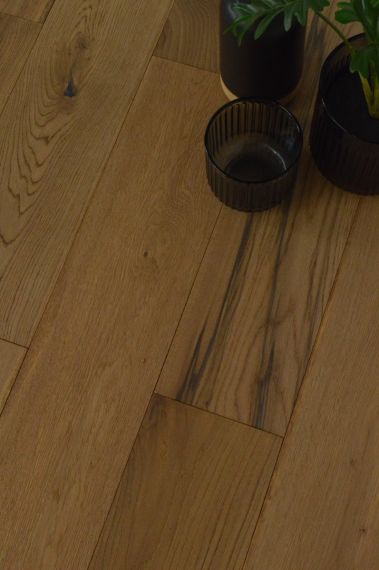
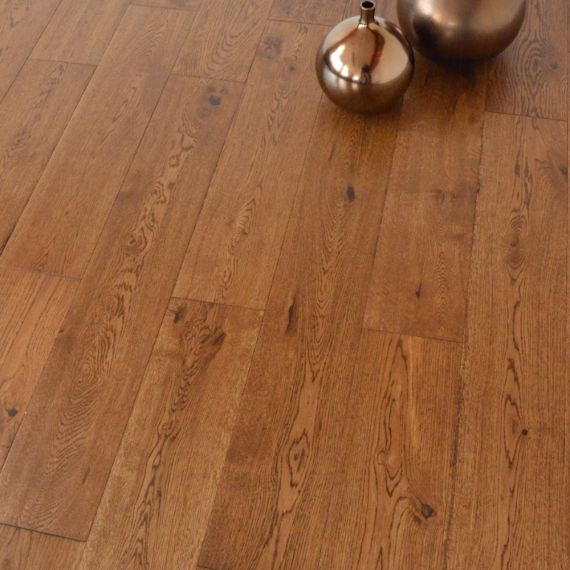
 Twickenham Solid Golden Oak Lacquered & Handscraped 125mm X 18mm Wood Flooring
£ 98.49 m² inc. VAT
£48.99㎡
inc. VAT£48.99㎡
inc. VATProduct Code: 125ANT1
-
OakSpecies
-
HandscrapedFinish
-
125mm X 18mmWidth/Depth
-
Tongue & GrooveInstall
-
300-900mmLength
-
-
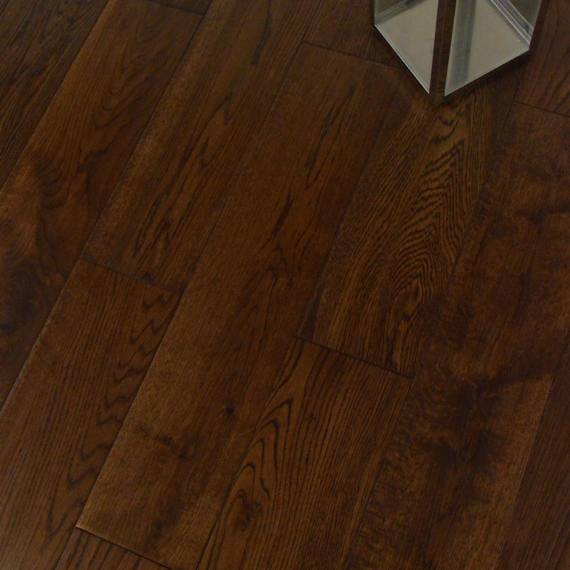
 Twickenham Solid Antique Coffee Oak Handscraped 125mm X 18mm Wood Flooring
£ 91.49 m² inc. VAT
£48.99㎡
inc. VAT£48.99㎡
inc. VATProduct Code: 125COF1
-
OakSpecies
-
HandscrapedFinish
-
125mm X 18mmWidth/Depth
-
Tongue & GrooveInstall
-
300-1200mmLength
-
-
 Edmonton Solid Unfinished Oak 150mm x 18mm Wood Flooring
£ 93.99 m² inc. VAT
£52.99㎡
inc. VAT£52.99㎡
inc. VATProduct Code: 150UNF1
-
OakSpecies
-
UnfinishedFinish
-
150mm X 18mmWidth/Depth
-
Tongue & GrooveInstall
-
300-1200mmLength
-
-
 Edmonton Solid Silver Grey Oak Brushed & Lacquered 150mm x 18mm Wood Flooring
£ 96.49 m² inc. VAT
£52.99㎡
inc. VAT£52.99㎡
inc. VATProduct Code: 150LG1
-
OakSpecies
-
Brushed & LacqueredFinish
-
150mm X 18mmWidth/Depth
-
Tongue & GrooveInstall
-
300-1200MMLength
-
-
 Edmonton Solid Smoked Oak Brushed & Lacquered 150mm x 18mm Wood Flooring
£ 92.49 m² inc. VAT
£52.99㎡
inc. VAT£52.99㎡
inc. VATProduct Code: 150SMOK1
-
OakSpecies
-
Brushed & LacqueredFinish
-
150mm X 18mmWidth/Depth
-
Tongue & GrooveInstall
-
300mm-1200mmLength
-
-
 Edmonton Solid Light Smoked Oak Brushed & Oiled 150mm x 18mm Wood Flooring
£ 100.49 m² inc. VAT
£54.99㎡
inc. VAT£54.99㎡
inc. VATProduct Code: 150SBWW1
-
OakSpecies
-
Brushed & OiledFinish
-
150mm X 18mmWidth/Depth
-
Tongue & GrooveInstall
-
300-1200mmLength
-
-
 Edmonton Solid Acacia Walnut Lacquered 122mm X 18mm Wood Flooring
£ 93.99 m² inc. VAT
£49.99㎡
inc. VAT£49.99㎡
inc. VATProduct Code: 122ACAWAL1
-
WalnutSpecies
-
LacqueredFinish
-
122mm X 18mmWidth/Depth
-
Tongue & GrooveInstall
-
300-1200mmLength
-
-
 Edmonton Solid Natural Oak Lacquered 83mm x 18mm Wood Flooring
£ 106.49 m² inc. VAT
£59.99㎡
inc. VAT£59.99㎡
inc. VATProduct Code: 83LAC1
-
OakSpecies
-
LacqueredFinish
-
83mm X 18mmWidth/Depth
-
Tongue & GrooveInstall
-
300-1200mmLength
-
-
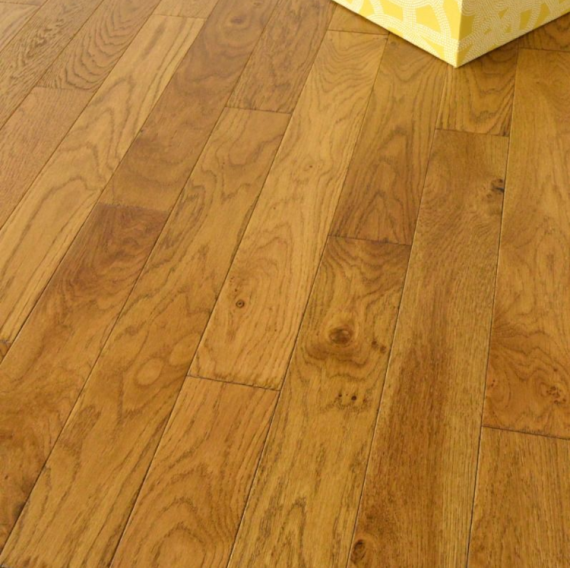 Edmonton Solid Golden Oak Brushed & Lacquered 83mm x 18mm Wood Flooring
£ 77.49 m² inc. VAT
£42.99㎡
inc. VAT£42.99㎡
inc. VATProduct Code: 83GOLBL1
-
OakSpecies
-
Brushed & LacqueredFinish
-
83mm X 18mmWidth/Depth
-
Tongue & GrooveInstall
-
300-1200mmLength
-
-
 Edmonton Solid Smoked Grey Oak Brushed & Oiled 150mm x 18mm Wood Flooring
£ 95.49 m² inc. VAT
£52.99㎡
inc. VAT£52.99㎡
inc. VATProduct Code: 150SMG1
-
OakSpecies
-
Brushed & OiledFinish
-
150mm X 18mmWidth/Depth
-
Tongue & GrooveInstall
-
300-1200MMLength
-
-
 Edmonton Solid White Oak Brushed & Lacquered 150mm x 18mm Wood Flooring
£ 92.49 m² inc. VAT
£52.99㎡
inc. VAT£52.99㎡
inc. VATProduct Code: 150WHIT1
-
OakSpecies
-
Brushed & LacqueredFinish
-
150mm X 18mmWidth/Depth
-
Tongue & GrooveInstall
-
300-1200MMLength
-
-
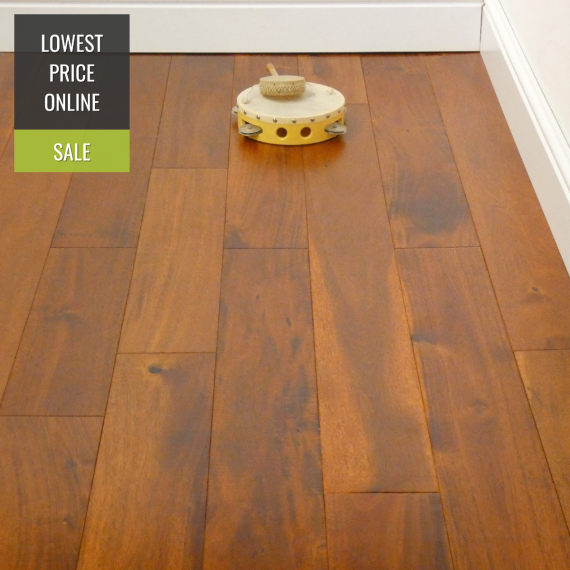
 Edmonton Solid Golden Oak Handscraped 150mm x 18mm Wood Flooring
£ 97.49 m² inc. VAT
£48.99㎡
inc. VAT£48.99㎡
inc. VATProduct Code: 150GOLHS1
-
OakSpecies
-
HandscrapedFinish
-
150mm X 18mmWidth/Depth
-
Tongue & GrooveInstall
-
300-1200mmLength
-
-
 Edmonton Elite Solid Coffee Oak Handscraped 150mm x 18mm Wood Flooring
£ 99.49 m² inc. VAT
£52.99㎡
inc. VAT£52.99㎡
inc. VATProduct Code: 150COFHS1
-
OakSpecies
-
HandscrapedFinish
-
150mm X 18mmWidth/Depth
-
Tongue & GrooveInstall
-
300-1200MMLength
-
-
 Twickenham Solid Smoked Oak Brushed & lacquered 70mm x 18mm Wood Flooring
£ 73.99 m² inc. VAT
£42.99㎡
inc. VAT£42.99㎡
inc. VATProduct Code: 70SMOK1
-
OakSpecies
-
Brushed & OiledFinish
-
70mm X 18mmWidth/Depth
-
Tongue & GrooveInstall
-
300-1200mmLength
-
-
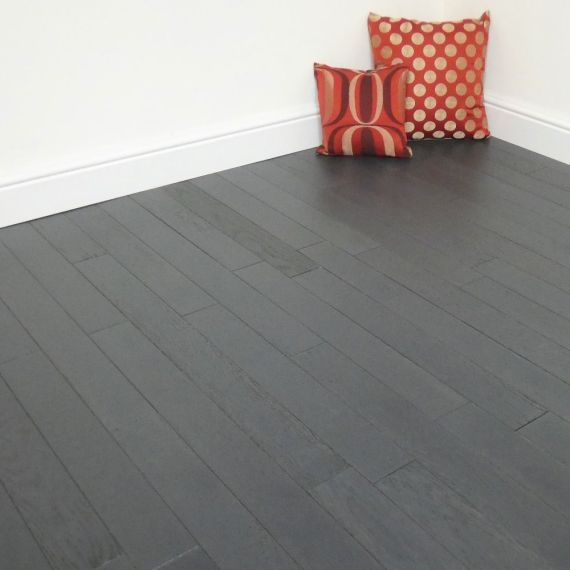 Milano Solid Black Oak Brushed & Lacquered 83mm x 18mm Wood Flooring
£ 77.49 m² inc. VAT
£42.99㎡
inc. VAT£42.99㎡
inc. VATProduct Code: 83BLACK1
-
OakSpecies
-
Brushed & LacqueredFinish
-
83mm X 18mmWidth/Depth
-
Tongue & GrooveInstall
-
300-1200MMLength
-
-
 Twickenham Elite Solid Coffee Oak Handscraped 203mm X 18mm Wood Flooring
£ 160.49 m² inc. VAT
£61.49㎡
inc. VAT£61.49㎡
inc. VATProduct Code: AK203CHOC1
-
OakSpecies
-
HandscrapedFinish
-
203mm X 18mmWidth/Depth
-
Tongue & GrooveInstall
-
2200mmLength
-
-
 Edmonton Solid Smoked Oak Handscraped 203mm x 18mm Wood Flooring
£ 160.49 m² inc. VAT
£61.49㎡
inc. VAT£61.49㎡
inc. VATProduct Code: AK203SMOK1
-
OakSpecies
-
HandscrapedFinish
-
203mm X 18mmWidth/Depth
-
Tongue & GrooveInstall
-
2200mmLength
-
-
 Twickenham Solid Natural Oak Lacquered 90mm X 18mm Wood Flooring
£ 95.49 m² inc. VAT
£42.99㎡
inc. VAT£42.99㎡
inc. VATProduct Code: 90LAC1
-
OakSpecies
-
LacqueredFinish
-
90mm X 18mmWidth/Depth
-
Tongue & GrooveInstall
-
300-1200mmLength
-


